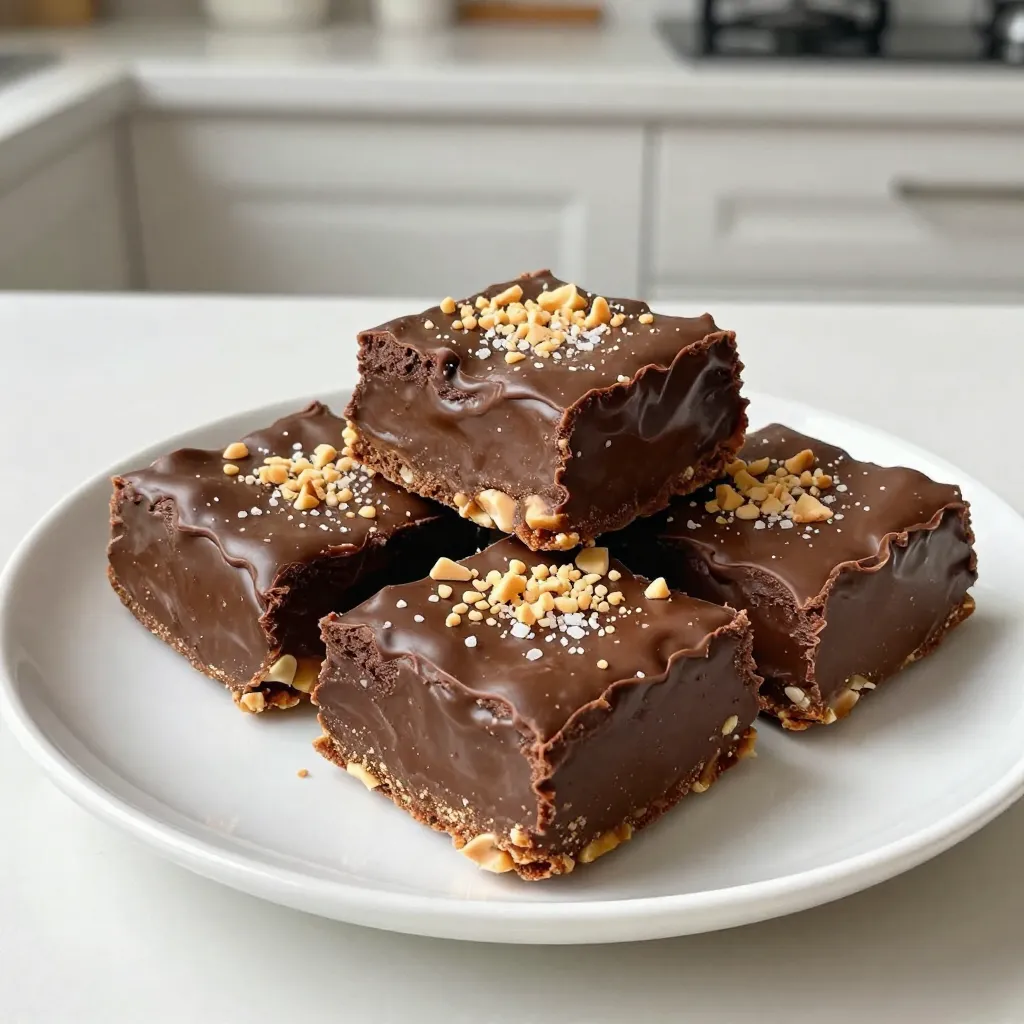
Craving a rich, sweet treat? Look no further than my Chocolate Peanut Butter Fudge. This delightful dessert combines smooth chocolate and creamy peanut butter for a snack that’s hard to resist. In this guide, I’ll share easy steps, tips, and ways to customize your fudge. Whether you want a classic version or a special twist, this fudge will satisfy your taste buds and impress your friends. Let’s get started!
Why I Love This Recipe
- Indulgent Flavor Combination: The rich, creamy blend of chocolate and peanut butter creates a delightful treat that satisfies any sweet tooth.
- Simple Preparation: With just a few ingredients and straightforward steps, this recipe is perfect for both novice and experienced bakers.
- Customizable Toppings: Add your favorite toppings to personalize the fudge and enhance its texture, making it uniquely yours.
- Perfect for Sharing: Cut into squares, this fudge is ideal for gatherings, parties, or simply sharing with friends and family.
Ingredients
List of Required Ingredients
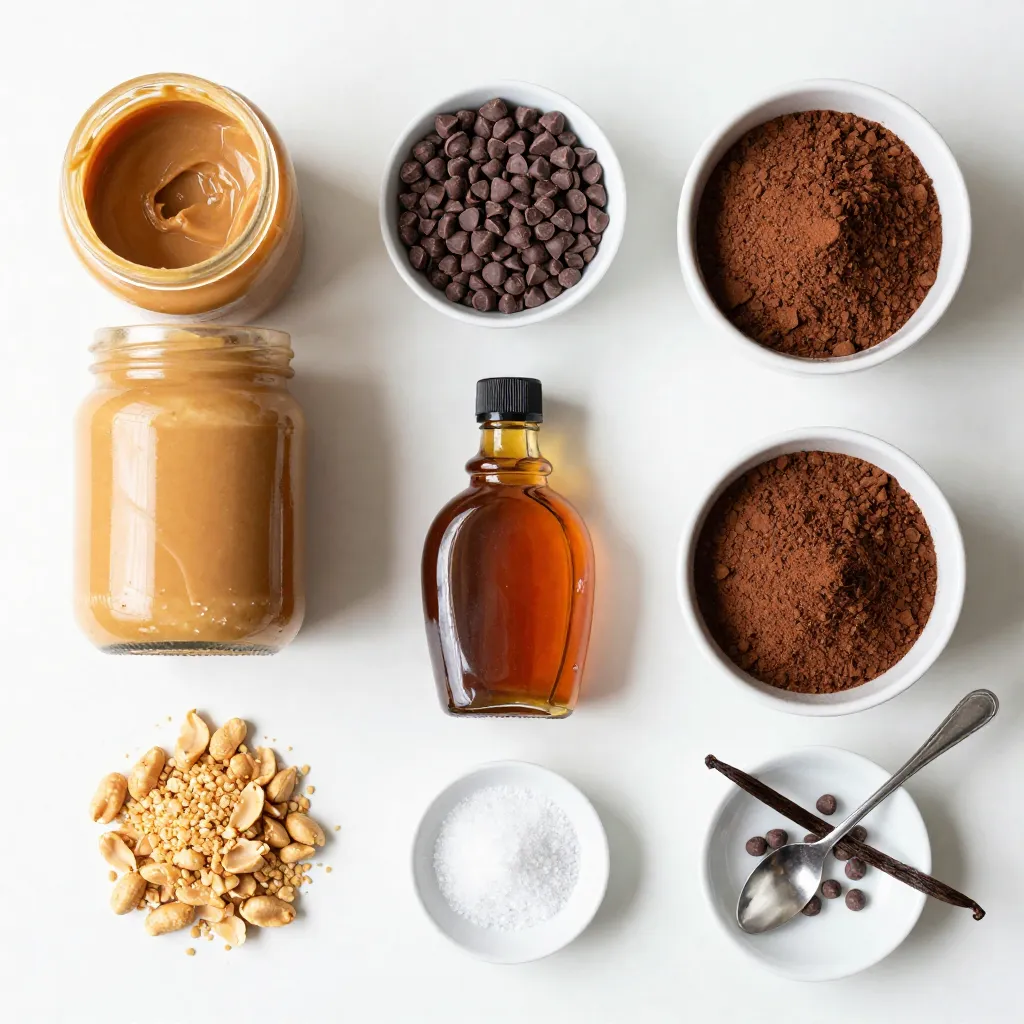
To make Chocolate Peanut Butter Fudge, you need these key items:
– 1 cup creamy peanut butter
– 1 cup semi-sweet or dark chocolate chips
– 1/2 cup unsweetened cocoa powder
– 1/4 cup maple syrup or honey
– 1 teaspoon pure vanilla extract
– A pinch of salt
These ingredients create a rich, smooth fudge that melts in your mouth. The mixture of peanut butter and chocolate is simply heavenly.
Optional Toppings for Extra Flavor
You can enhance your fudge with toppings like:
– Crushed peanuts
– Flaked sea salt
– Mini chocolate chips
These toppings add texture and extra flavor. They make your fudge look great too!
Ingredient Substitutions
If you need to change some ingredients, here are my suggestions:
– For the peanut butter, use almond butter or sun butter for a nut-free option.
– Swap maple syrup with agave nectar or corn syrup if you prefer.
– Use dairy-free chocolate chips for a vegan version.
These swaps can help you fit your diet needs while keeping the fudge delicious.
Step-by-Step Instructions
Preparation of the Baking Dish
Start by lining an 8-inch square baking dish with parchment paper. Make sure the paper hangs over the edges. This helps later when you lift out the fudge. It makes cutting much easier.
Melting the Peanut Butter and Chocolate
Next, grab a medium saucepan and set it over low heat. Add 1 cup of creamy peanut butter and 1 cup of chocolate chips into the pan. Stir with a spatula until it melts into a smooth mix. Keep stirring so nothing burns.
Combining Ingredients for Fudge Mixture
Once melted, take the saucepan off the heat. Now, add ½ cup of cocoa powder, ¼ cup of maple syrup or honey, and 1 teaspoon of vanilla extract. Don’t forget a pinch of salt! Stir it all together until thick and fudgy.
Pouring and Spreading the Fudge
Carefully pour the fudge mixture into your lined baking dish. Use a spatula to spread it evenly. Aim for a uniform thickness so each piece is just right.
Adding Optional Toppings
If you want to jazz it up, sprinkle crushed peanuts, flaked sea salt, or mini chocolate chips on top. These toppings add flavor and texture. Feel free to get creative!
Chilling and Cutting the Fudge
Place the dish in the fridge for at least 2 hours. This time is key for the fudge to set. After it’s firm, lift it out using the parchment paper. Use a sharp knife to cut it into squares. Be careful to slice through any toppings.
Tips & Tricks
Maintaining Ideal Fudge Consistency
To get the best fudge, watch your heat. Melt the peanut butter and chocolate slowly. Stir often so it stays smooth. If it’s too thick, add a bit more syrup. If too soft, chill it longer. The right texture is firm yet soft.
Common Mistakes to Avoid
One mistake is not lining the pan well. If you do not use parchment paper, it’s hard to lift out the fudge. Another mistake is not waiting for it to set. Cutting it too soon makes a mess. Also, don’t skip the salt! It brings out the flavors.
Presentation Tips for Serving
For a fun touch, cut the fudge into different shapes. Use a cookie cutter for stars or hearts. Place the fudge on a nice plate. Add toppings like crushed peanuts or a drizzle of chocolate. These small details make it look professional and inviting.
Pro Tips
- Use room temperature ingredients: Ensuring your peanut butter is at room temperature helps it blend more easily with the chocolate, resulting in a smoother fudge.
- Experiment with flavors: Add a dash of espresso powder or a few drops of almond extract to enhance the flavor profile of your fudge.
- Chill thoroughly: Make sure to chill the fudge for at least 2 hours, as this allows it to set properly and achieve the perfect texture.
- Store properly: Keep your fudge in an airtight container in the refrigerator to maintain its freshness and prevent it from becoming too soft.
Variations
Nut-Free Chocolate Peanut Butter Fudge
If you want nut-free fudge, use sun butter instead of peanut butter. Sun butter is creamy and has a similar taste. You can also use tahini for a unique twist. Just follow the same steps in the recipe. This way, you can enjoy fudge without nuts.
Vegan Options for the Fudge
To make vegan fudge, swap honey for maple syrup. Use dark chocolate chips that are dairy-free. Many brands offer vegan chocolate chips. This keeps the fudge rich and tasty while being plant-based. Follow the rest of the recipe as is, and you’ll have a great vegan treat.
Flavor Additions (Mint, Espresso, etc.)
You can add fun flavors to your fudge! For mint fudge, mix in 1 teaspoon of peppermint extract. If you love coffee, stir in 1 tablespoon of espresso powder. These flavors make your fudge even more special. You can also try adding a pinch of cinnamon for a warm twist. Just be creative and mix what you love!
Storage Info
Best Practices for Storing Fudge
To keep your fudge fresh, store it in an airtight container. Use parchment paper to separate layers of fudge. This prevents them from sticking together. Place the container in a cool, dry place, away from sunlight. Avoid storing fudge in the fridge as it can dry out.
How Long Does Fudge Last?
When stored properly, fudge can last up to two weeks at room temperature. If you keep it in the fridge, it can last up to a month. However, the texture may change. For the best taste and feel, enjoy it within the first week.
Freezing and Thawing Chocolate Peanut Butter Fudge
You can freeze fudge for up to three months. Cut it into squares before freezing. Wrap each piece in plastic wrap, then place them in a freezer bag. When you want to enjoy the fudge, simply take it out. Let it thaw in the fridge for a few hours. This keeps the texture nice and smooth.
FAQs
What is the best way to cut fudge?
To cut fudge, start with a sharp knife. Use a clean, dry knife to avoid sticking. First, chill the fudge for at least two hours. After it’s set, lift it out with the parchment paper. Place it on a cutting board. Cut it into small squares or rectangles. Wipe the knife with a damp cloth between cuts for smooth edges. This helps keep each piece neat and pretty.
Can I use crunchy peanut butter instead of creamy?
Yes, you can use crunchy peanut butter! It will add texture and a nutty bite to your fudge. Just swap it in for the creamy kind. The flavor will still be rich and delicious. If you like a little crunch, this is a great choice. Just keep in mind that it may affect the smoothness of the fudge slightly.
How do I know when the fudge is set?
You will know the fudge is set when it feels firm to the touch. It should not be sticky or soft. After about two hours in the fridge, check it. If it holds its shape when pressed gently, it’s ready to cut. If it is still soft, leave it in the fridge for a bit longer. Patience pays off for that perfect fudge!
Can I add other mix-ins like fruits or candy?
Absolutely! You can add mix-ins like dried fruits, nuts, or candy pieces. Just fold them in before pouring the fudge into the dish. This makes each bite a fun surprise. Be careful not to add too many, as it may change the texture. A few mix-ins can add flavor without overwhelming the fudge.
Is this fudge suitable for gifting?
Yes, this fudge makes a great gift! It is easy to make and looks lovely. Once cut, place the fudge in a nice box or on a decorative plate. You can wrap it in cellophane or tie it with a ribbon. Personal touches make it special. Friends and family will love receiving this sweet treat!
This blog shared all you need to know about making chocolate peanut butter fudge. We covered the ingredients, step-by-step instructions, tips, variations, and storage advice. You can create your fudge with simple steps and fun flavors. Remember to avoid common mistakes to ensure a perfect treat. Enjoy making this tasty fudge for yourself or as a gift. Your friends and family will love i