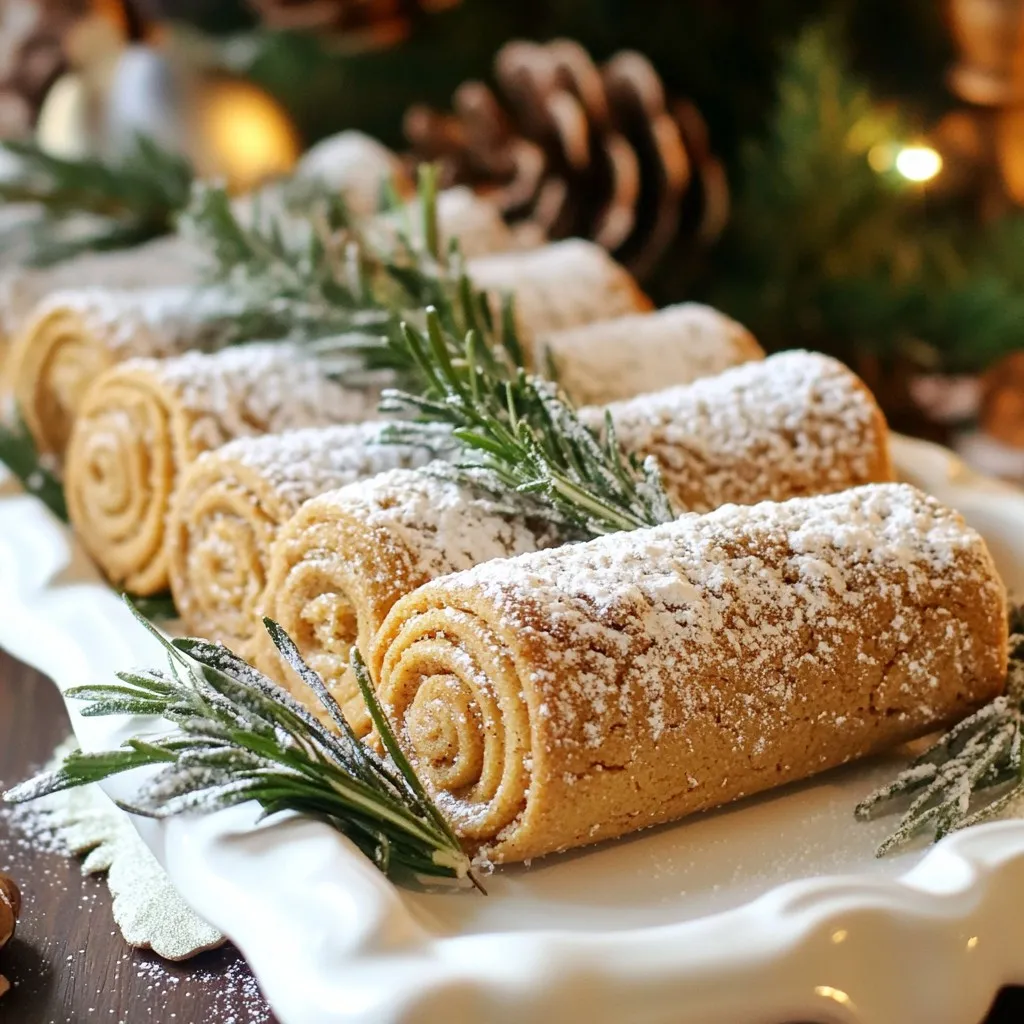
Get ready to brighten your holiday season with Gingerbread Yule Log Cookies! These festive treats blend the warmth of ginger and spices with fun, log-shaped cookies, perfect for sharing. I’ll guide you through easy steps to create these delightful cookies that will impress your family and friends. With simple ingredients and creative decorating ideas, you’ll craft a sweet masterpiece that embodies the spirit of the holidays! Let’s dive into the delicious details!
Why I Love This Recipe
- Perfect Holiday Flavor: These cookies encapsulate the warm and spicy flavors of the holiday season, making them a delightful treat for any festive gathering.
- Fun to Make: The process of rolling and cutting the dough into logs is not only enjoyable but also a great activity to do with family or friends.
- Beautiful Presentation: With their charming glaze and festive decorations, these cookies are as visually appealing as they are delicious, perfect for holiday platters.
- Customizable: Feel free to get creative with the edible decorations, allowing you to personalize each cookie to match your holiday theme.
Ingredients
Main Ingredients
– 2 cups all-purpose flour
– 3/4 cup brown sugar, packed
– 1/2 cup unsalted butter, softened
– 1 large egg
– 1/4 cup molasses
Spices and Baking Essentials
– 1 teaspoon baking soda
– 1 teaspoon ground ginger
– 1 teaspoon ground cinnamon
– 1/2 teaspoon ground nutmeg
– 1/2 teaspoon ground allspice
– 1/4 teaspoon salt
Decoration Ingredients
– 1 cup powdered sugar (for decoration)
– 1 tablespoon milk (for decoration)
– Edible decorations (e.g., holly leaves or festive sprinkles)
When making Gingerbread Yule Log Cookies, gather all your ingredients first. This helps you stay organized and makes cooking fun. The main ingredients create a warm, spiced flavor that you’ll love.
Start with the all-purpose flour. It gives the cookies structure. Brown sugar adds sweetness and a nice texture. Softened butter makes the dough creamy. An egg binds everything together, while molasses adds that classic gingerbread taste.
Next, you need spices. Baking soda helps the cookies rise. Ground ginger and cinnamon give them their warm, cozy flavors. Nutmeg and allspice add depth, while salt balances the sweetness.
For decoration, powdered sugar becomes glaze when mixed with milk. This sweet drizzle makes your cookies look festive. Don’t forget edible decorations like holly leaves or sprinkles. They add a cheerful touch to your holiday treats.
Now you’re ready to bake! Make sure to have all your ingredients measured and set. This way, you’ll enjoy the process and create delicious cookies that everyone will love.

Step-by-Step Instructions
Preparation Steps
– Preheat your oven to 350°F (175°C).
– Line your baking sheet with parchment paper.
– In a medium bowl, mix the flour, baking soda, ginger, cinnamon, nutmeg, allspice, and salt.
Combine Wet Ingredients
– In a large bowl, beat the softened butter and brown sugar until creamy.
– Add the egg, molasses, and vanilla extract. Mix well until combined.
Forming the Cookies
– Gradually add the dry mixture to the wet ingredients. Stir until a dough forms.
– Roll the dough out on a floured surface to about 1/4 inch thick.
– Cut the dough into logs, about 2 inches long and 1 inch wide.
– Place the logs on the prepared sheet, spacing them an inch apart.
– Bake for 10-12 minutes until the edges are lightly golden.
– Let the cookies cool on the baking sheet for 5 minutes. Then, transfer them to a wire rack to cool completely.
Decorating Cookies
– To make the glaze, mix the powdered sugar and milk. Aim for a thick yet pourable consistency.
– Drizzle the glaze over the cooled cookies.
– While the glaze is wet, add your edible decorations like holly leaves or festive sprinkles.
Tips & Tricks
Perfecting the Dough
To make the best Gingerbread Yule Log Cookies, focus on the dough. If your dough feels sticky, chill it in the fridge for 15-20 minutes. This makes it easier to handle. When rolling the dough, aim for a thickness of about 1/4 inch. This helps them bake evenly. Use a light touch with the rolling pin to avoid sticking.
Baking Tips
Keep an eye on your oven temperature. Preheat it to 350°F (175°C) for the best results. Place your baking sheet in the center of the oven for even heat. The cookies need about 10-12 minutes to bake. Look for a light golden edge. When they feel slightly firm, take them out. Let them cool on the baking sheet for 5 minutes before transferring them to a wire rack.
Glaze and Decoration Tips
The glaze adds charm to your cookies. Mix 1 cup of powdered sugar with 1 tablespoon of milk. Aim for a thick yet pourable consistency. Drizzle this glaze over the cooled cookies. While the glaze is wet, add your favorite edible decorations. Best choices include holly leaves or festive sprinkles. These add color and fun to your cookies.
Pro Tips
- Chill the Dough: If your dough is too sticky to handle, refrigerate it for 15-20 minutes. This makes it easier to roll out and cut into logs.
- Even Baking: For even baking, rotate the baking sheet halfway through the baking time. This helps ensure all cookies are baked uniformly.
- Glaze Consistency: When making the glaze, adjust the milk amount based on your desired thickness. A thicker glaze will hold its shape better on cookies.
- Festive Decorations: Use a variety of edible decorations to enhance the visual appeal of your cookies. Consider adding sprinkles, small candies, or fresh herbs for a pop of color.
Variations
Flavor Variations
You can make these cookies even more fun. Try adding chocolate chips or chopped nuts. These will give a nice crunch and a sweet touch. You can also switch up the spices. Cardamom or cloves can add a new twist. Just a little bit can change the whole flavor!
Gluten-Free Option
If you need a gluten-free version, it’s simple! Just swap the all-purpose flour with gluten-free flour. This keeps the cookies tasty while fitting your diet. Make sure to check the flour’s texture for the best results.
Vegan Adaptation
For a vegan version, use vegan butter instead of regular butter. You can also replace the egg with flaxseed meal or applesauce. This keeps the cookies soft and delicious. Just follow the same steps, and you’ll have a lovely treat!
Storage Info
Storing Cookies
To keep your Gingerbread Yule Log Cookies fresh, store them at room temperature. Place them in an airtight container. This helps keep them soft and tasty. You can also add a slice of bread in the container. The bread helps keep the cookies moist.
If you want to save some for later, freezing is a great option. Wrap each cookie in plastic wrap. Then, place them in a freezer-safe bag. Make sure to remove all the air before sealing. This way, they stay fresh for up to three months.
Shelf Life
In an airtight container, these cookies last around one week at room temperature. After a week, they may lose their soft texture. You can also check for signs that they are going bad. If you see any mold or they smell off, it’s best to throw them away.
Enjoy your festive treats while they are fresh!
FAQs
Common Questions
How do I get the perfect shape for Yule log cookies?
To shape the cookies well, roll the dough to about 1/4-inch thick. Cut logs that are around 2 inches long and 1 inch wide. Make sure to space them out on the baking sheet. This helps them keep their shape while baking.
Can I make the dough in advance?
Yes, you can make the dough ahead of time. After mixing, wrap it tightly in plastic wrap. Chill it in the fridge for up to three days. When ready, just roll and cut the cookies as normal.
What is the best way to serve Gingerbread Yule Log Cookies?
I love to serve these cookies on a festive platter. Dust them with powdered sugar for a snowy look. You can add sprigs of rosemary or holly leaves for extra flair.
Can I make these cookies without molasses?
You can replace molasses with honey or maple syrup. This will change the flavor slightly but will still taste good. Just keep the same amount to keep the dough moist.
In this guide, we explored the key ingredients and steps to make Gingerbread Yule Log Cookies. You learned about the main ingredients, spices, and decoration essentials. The post also shared tips for perfecting your dough and baking process.
For your final cookie creation, remember to experiment with flavors and decorations. Whether you stick to the classic recipe or try a variation, these cookies will bring joy. Enjoy your baking journe