If you’re looking for a delicious and easy dish, you've found it! Parmesan Crusted Tilapia is packed with flavor and quick to make. This recipe uses simple ingredients to create a crispy, tasty crust that you and your family will love. Ready to impress your dinner guests? Let's dive into how to make this simple yet delightful meal that’s sure to become a weeknight favorite!
Why I Love This Recipe
- Quick and Easy: This recipe comes together in just 25 minutes, making it perfect for busy weeknights or last-minute dinner guests.
- Flavorful Crust: The combination of Parmesan cheese and panko breadcrumbs creates a deliciously crispy and cheesy topping that elevates the mild flavor of tilapia.
- Healthy Option: Tilapia is a lean source of protein, and with the addition of fresh herbs and lemon, this dish is both nutritious and satisfying.
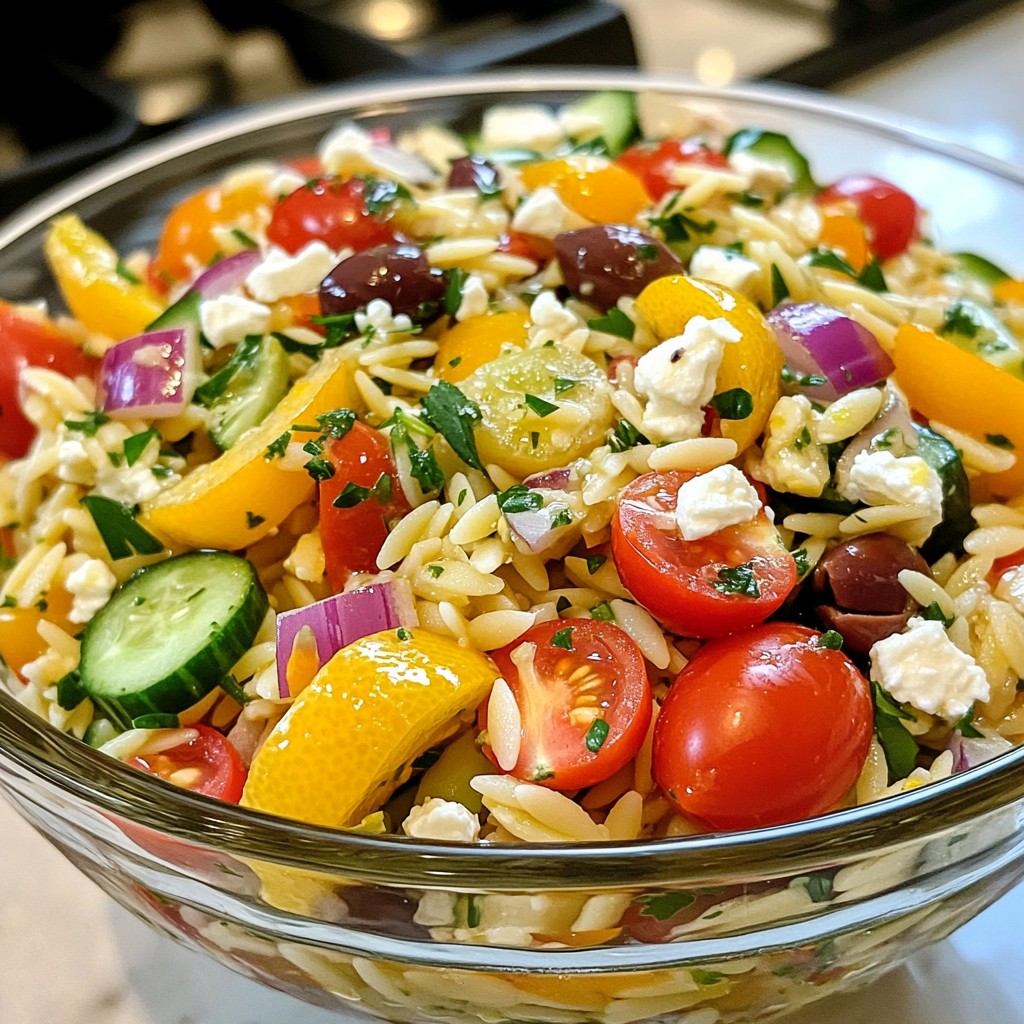
- Versatile Pairing: This dish pairs beautifully with a variety of sides, from sautéed spinach to a light salad, making it a versatile choice for any meal.
Ingredients
Complete Ingredient List
- 4 tilapia fillets
- 1 cup freshly grated Parmesan cheese
- 1/2 cup panko breadcrumbs
- 1 teaspoon garlic powder
- 1 teaspoon dried oregano
- 1/2 teaspoon black pepper
- 1/2 teaspoon salt
- 1/4 cup mayonnaise
- 2 tablespoons fresh lemon juice
- 2 tablespoons fresh parsley, finely chopped
- Olive oil or cooking spray
Gathering the right ingredients makes cooking fun and easy. For this dish, I choose fresh tilapia fillets. They are mild and flaky. You can find them at most grocery stores. Next, I use freshly grated Parmesan cheese. It adds a rich flavor and nice texture. Panko breadcrumbs come next. They give the crust a delightful crunch.
I also include garlic powder and dried oregano for a burst of flavor. Black pepper and salt enhance the taste without overpowering it. I use mayonnaise to help the crust stick to the fish. Fresh lemon juice adds brightness and zesty flavor. Lastly, I garnish with fresh parsley. It adds color and a touch of freshness to the dish.
With this complete ingredient list, you can create a delicious meal. This dish is simple yet packed with flavor.
Step-by-Step Instructions
Preparing the Oven and Baking Sheet
First, set your oven to 400°F (200°C). This heat will cook the tilapia evenly. Next, take a baking sheet and grease it lightly with olive oil or cooking spray. This step stops the fish from sticking.
Mixing the Dry Ingredients
In a mixing bowl, grab 1 cup of grated Parmesan cheese. Add 1/2 cup of panko breadcrumbs for a nice crunch. Toss in 1 teaspoon of garlic powder, 1 teaspoon of dried oregano, 1/2 teaspoon of black pepper, and 1/2 teaspoon of salt. Mix well until everything is blended.
Preparing the Mayo Mixture
In another bowl, combine 1/4 cup of mayonnaise with 2 tablespoons of fresh lemon juice. Whisk until smooth. This creamy mix helps the crust stick to the fish and adds great flavor.
Coating the Tilapia
Take one tilapia fillet and spread the mayo mixture on top. Be sure to cover the entire surface. Next, press the fillet into the Parmesan mixture, coating it well. Repeat this for all the fillets.
Baking the Fillets
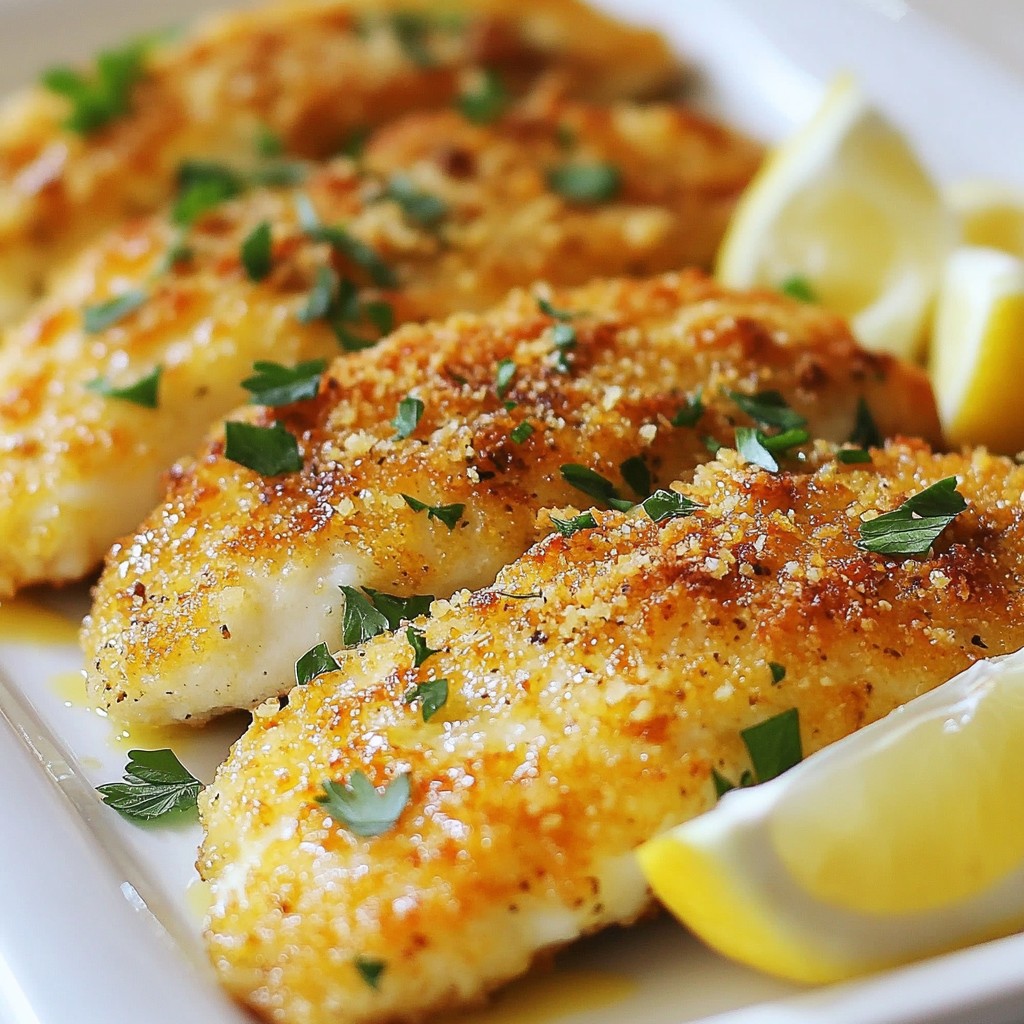
Place the coated fillets on the greased baking sheet, crusted side up. Bake them in the oven for 12 to 15 minutes. You’ll know they’re ready when the fish is opaque and flakes easily. The crust should be golden brown and crispy.
Serving Suggestions
After baking, let the fillets rest for a few minutes. Serve them on a bed of sautéed spinach or mixed greens. For a fresh touch, add lemon wedges on the side. A sprinkle of fresh parsley adds color and flavor. Enjoy your meal!
Tips & Tricks
Achieving the Perfect Crust
To get that crunchy, golden crust, use fresh Parmesan cheese. Grate it yourself for the best flavor. Mix it well with panko breadcrumbs, garlic powder, oregano, black pepper, and salt. Press the tilapia firmly into this mixture. This helps the crust stick and become crispy when baking.
How to Choose Fresh Tilapia
Look for tilapia that is pink and has no strong fishy smell. The flesh should feel firm and spring back when touched. If you can, buy from a trusted fishmonger to ensure quality. Fresh tilapia is key for a tasty dish.
Best Pairings or Side Dishes
Pair your tilapia with sautéed spinach or mixed greens. A light salad complements the fish well. Add lemon wedges on the side for a zesty touch. For a filling meal, serve with quinoa or brown rice. These sides balance the meal and add nutrition.
Pro Tips
- Use Fresh Ingredients: Always opt for fresh tilapia fillets and high-quality Parmesan cheese to enhance the flavors of your dish.
- Experiment with Seasonings: Feel free to add other herbs and spices, such as thyme or paprika, to the breadcrumb mixture for added depth of flavor.
- Adjust Cooking Times: Depending on the thickness of your tilapia fillets, cooking times may vary. Keep an eye on them to avoid overcooking.
- Make it a Meal: Pair your tilapia with a side of roasted vegetables or a light salad to create a complete and balanced meal.
Variations
Adding Herbs or Spices
You can boost the flavor of your Parmesan crusted tilapia by adding herbs or spices. Try mixing in fresh herbs like thyme or basil. A sprinkle of red pepper flakes adds a nice kick. You can also use Italian seasoning for a classic touch. Experiment with what you like best!
Alternative Coatings
If you want to switch up the crust, there are great options. Instead of panko, try crushed cornflakes for extra crunch. Almond flour gives a nutty flavor and is gluten-free. You could also use crushed tortilla chips for a fun twist. Each option changes the taste and texture of the dish.
Ingredient Substitutions
Do you need to make this dish with different ingredients? No problem! If you don’t have tilapia, use cod or haddock. Greek yogurt can replace mayonnaise for a lighter option. For a dairy-free version, use nutritional yeast instead of Parmesan. Each swap can create a new flavor while keeping it tasty!
Storage Info
Storing Leftovers
Store leftover Parmesan crusted tilapia in an airtight container. Place it in the fridge. It will stay fresh for up to three days. Make sure to cool the fish before sealing. This helps prevent moisture buildup.
Reheating Instructions
To reheat, place the tilapia on a baking sheet. Preheat your oven to 350°F (175°C). Bake for about 10 minutes. This keeps the crust crispy. You can also use a microwave, but the crust may get soggy.
Freezing Tips
You can freeze Parmesan crusted tilapia. Wrap each fillet in plastic wrap, then place them in a freezer bag. Make sure to remove as much air as you can. It will stay good for up to two months. When ready to eat, thaw in the fridge overnight before reheating.
FAQs
What is the best way to tell when tilapia is cooked?
You can tell tilapia is cooked when it turns opaque. It should also flake easily with a fork. This change in color shows that it is safe to eat. The fish should feel firm but not dry.
Can I use other types of fish for this recipe?
Yes, you can use other mild fish like cod or haddock. They will work well with the Parmesan crust. Just adjust the cooking time as needed. Thicker fish may take a bit longer to cook.
How can I make this recipe gluten-free?
To make this dish gluten-free, replace panko breadcrumbs with gluten-free breadcrumbs. You can also use crushed gluten-free crackers. This keeps the crunch without any gluten.
What can I serve with Parmesan crusted tilapia?
I love serving this tilapia with sautéed spinach or a fresh salad. You can also pair it with rice or quinoa for a fuller meal. Lemon wedges add a nice touch, too.
Can I bake this dish in an air fryer?
You can absolutely bake this in an air fryer! Preheat your air fryer to 375°F (190°C). Cook the crusted tilapia for about 8-10 minutes. Check for doneness just like with the oven method.
This recipe for Parmesan crusted tilapia is simple and tasty. We covered the key ingredients needed, from tilapia fillets to fresh parsley. I walked you through easy steps, from baking to serving.
Remember, you can customize this dish with various spices or side dishes. Whether you store, reheat, or freeze leftovers, it remains a great meal option. Enjoy your cooking, and share your delicious results!