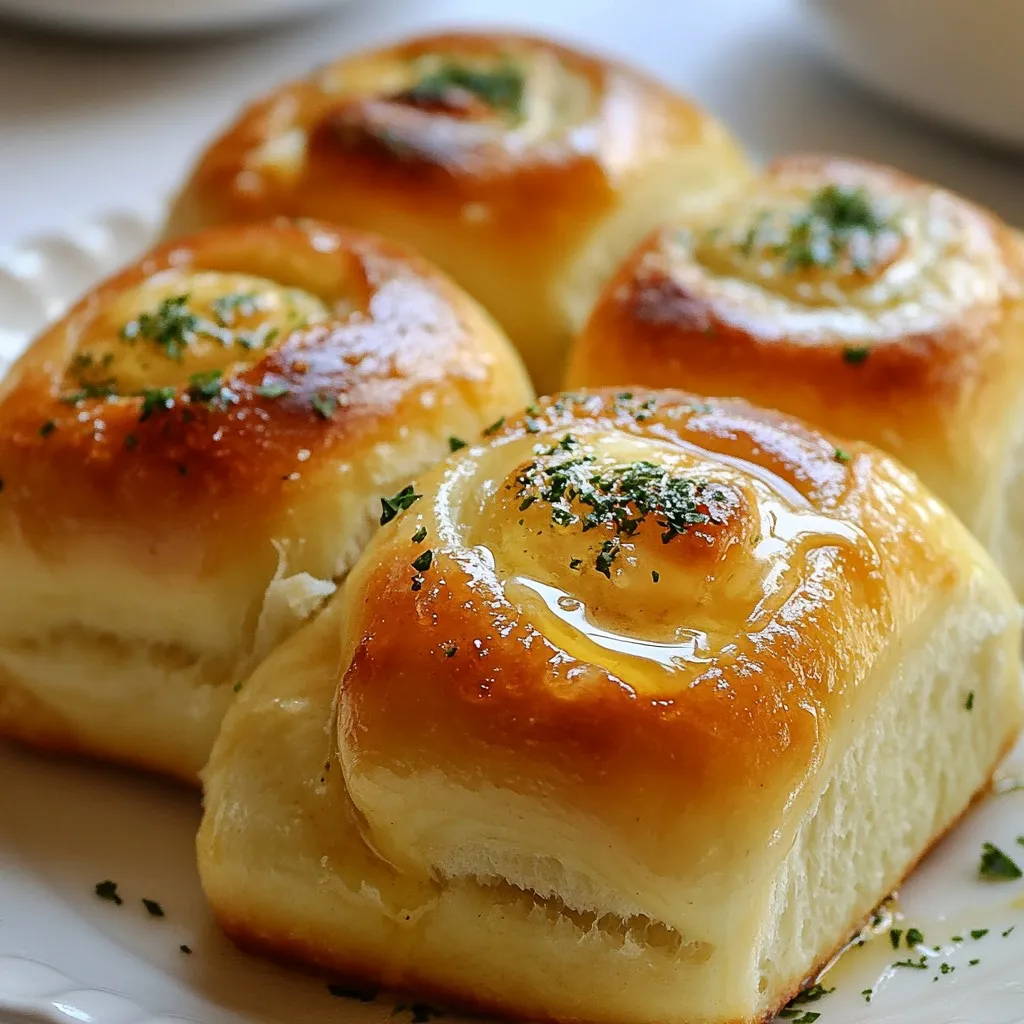
Indulge in the delight of homemade Soft Garlic Bread Rolls! These scrumptious and fluffy treats will elevate any meal. With just a few simple ingredients and easy steps, you can create the perfect addition to your dinner table. I’ll guide you through the process, from activating yeast to baking golden-brown rolls. Get ready to impress your family and friends with these mouthwatering delights they won’t be able to resist!
Why I Love This Recipe
- Delicious Flavor: The combination of garlic and butter creates an irresistible aroma and flavor that makes these rolls a standout at any meal.
- Fluffy Texture: Thanks to the careful kneading and rising, these rolls are incredibly soft and fluffy, perfect for soaking up sauces or enjoying on their own.
- Easy to Make: This recipe is straightforward and doesn’t require any special techniques, making it accessible for bakers of all levels.
- Perfect for Sharing: These rolls are ideal for gatherings, as they can be served warm and are always a hit with family and friends.
Ingredients
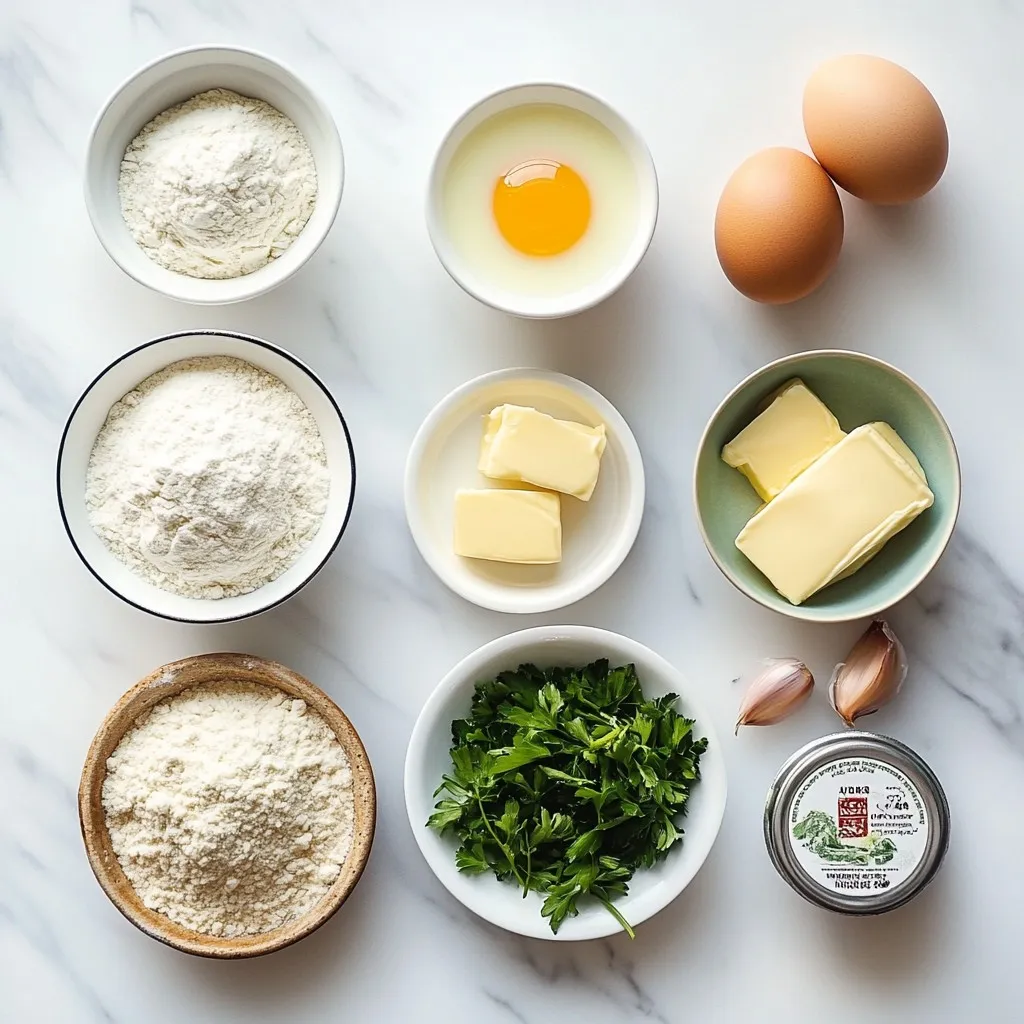
Key Ingredients for Soft Garlic Bread Rolls
– 3 cups all-purpose flour
– 2 tablespoons granulated sugar
– 1 packet instant yeast (2 ¼ teaspoons)
– 1 teaspoon fine salt
– 1 cup warm milk (about 110°F or 43°C)
– 1/4 cup unsalted butter, melted
– 1 large egg, at room temperature
– 4 cloves garlic, finely minced
– 1/4 cup fresh parsley, finely chopped
– 1/4 cup unsalted butter (for brushing on top)
The main ingredients create the rolls’ fluffy texture. The flour gives structure, while sugar helps yeast work. Yeast makes the dough rise, and salt adds flavor. Warm milk makes the dough soft. Butter adds richness and helps with browning. The egg helps bind everything together.
Optional Ingredients for Flavor Enhancements
– Grated Parmesan cheese
– Dried oregano
– Red pepper flakes
You can add Parmesan for a cheesy kick. Oregano brings an Italian flavor. Red pepper flakes add heat. Feel free to mix and match these options for your taste.
Recommended Tools and Equipment
– Mixing bowls
– Wooden spoon or spatula
– Clean kitchen towel
– Rolling pin
– Baking sheet
– Oven
These tools make the process easy. A mixing bowl helps combine ingredients. A wooden spoon is great for stirring. A clean towel keeps the dough warm. A rolling pin is handy if you want to shape the dough. A baking sheet is needed for baking. An oven ensures perfect rolls.
Getting these ingredients and tools ready sets you up for success. Enjoy the process!
Step-by-Step Instructions
Activating Yeast and Preparing Dough
First, grab a big bowl. Pour in 1 cup of warm milk, about 110°F. Add 2 tablespoons of sugar and 1 packet of instant yeast. Stir gently and let it sit for 5 minutes. The yeast should get bubbly and frothy. This shows it’s alive and ready to work.
Next, add 1/4 cup of melted unsalted butter and 1 large egg to the yeast mix. Mix well until everything is blended. In another bowl, whisk together 3 cups of all-purpose flour and 1 teaspoon of fine salt. Slowly add this flour mix to the wet ingredients. Stir with a wooden spoon until a shaggy dough forms.
Kneading and Shaping the Rolls
Now, it’s time to knead! Lightly flour your surface. Turn the dough out and knead it for 5 to 7 minutes. You want it smooth and elastic. This step is important for light and fluffy rolls.
Once kneaded, place the dough in a greased bowl. Cover it with a clean towel. Let it rise in a warm spot for about 1 hour, or until it doubles in size. When it’s ready, gently punch it down to release the air. Add 4 cloves of minced garlic and 1/4 cup of chopped parsley. Mix until they are evenly spread throughout the dough.
Next, divide the dough into 12 equal pieces. Shape each piece into a smooth ball. Arrange them on a greased baking sheet, leaving a little space between each one. Cover them with a towel again. Let them rise for another 30 minutes. They should look light and puffy.
Final Rising and Baking Instructions
While the rolls rise, preheat your oven to 350°F (175°C). After the second rise, brush the tops with melted butter. This adds great flavor! Bake them for 20 to 25 minutes. You want the tops to be golden brown and the rolls to be fully baked.
Once done, remove the rolls from the oven. Let them cool slightly on the baking sheet. For extra taste, brush the tops with more melted butter before serving. Enjoy your soft garlic bread rolls!
Tips & Tricks
Ensuring Soft and Fluffy Texture
To get soft and fluffy garlic bread rolls, use warm milk. The milk should be about 110°F (43°C). This warmth helps the yeast grow. Let the yeast mixture sit for five minutes. It should become bubbly. This means the yeast is ready.
Knead the dough well. This helps build gluten. Gluten makes the rolls rise. Knead until the dough feels smooth and elastic. It should spring back when you poke it.
When you shape the rolls, keep them uniform in size. This helps them bake evenly. Place them close together on the baking sheet. They will expand and touch as they rise and bake.
Common Mistakes to Avoid
One common mistake is not letting the dough rise enough. Always let it double in size. If you skip this step, your rolls will be dense.
Another mistake is using cold ingredients. Cold milk or eggs can slow down yeast growth. Always use room temperature ingredients for best results.
Avoid over-kneading the dough. This can make it tough. Knead just until it feels smooth and elastic.
Best Practices for Kneading and Rising
Kneading should take about five to seven minutes. Use a lightly floured surface. Make sure to fold the dough and push it away. This motion builds gluten.
For rising, find a warm spot in your kitchen. You can use an oven that’s turned off but still warm. Cover the bowl with a clean towel. This keeps the dough warm and moist.
After the first rise, punch the dough down gently. This releases air bubbles. Then knead in the garlic and parsley. It adds flavor without losing fluffiness.
Let the shaped rolls rise a second time for about 30 minutes. This final rise is key to achieving the perfect fluffy texture.
Pro Tips
- Check Yeast Freshness: Always verify the expiration date of your yeast before use. If in doubt, activate it with warm water and sugar to ensure it bubbles up properly.
- Optimal Dough Rising: For the best rise, place your dough in a warm, draft-free area. You can create a warm environment by turning on your oven to the lowest setting for a few minutes, then turning it off and placing the dough inside.
- Uniform Size Rolls: To achieve evenly baked rolls, use a kitchen scale to measure each portion of dough. This ensures all rolls are the same size, promoting even baking.
- Finishing Touch: For an extra flavor boost, add herbs or spices to the melted butter before brushing it on the rolls. Consider using garlic powder, Italian seasoning, or a pinch of sea salt.
Variations
Add Different Herbs or Cheeses
You can make soft garlic bread rolls even more fun. Try adding different herbs. Rosemary, thyme, or basil can bring new flavors. Mix in 1 tablespoon of dried herbs when you add the flour.
Cheese also works great! Shredded mozzarella or cheddar adds a tasty twist. Add about 1 cup of cheese when you knead in the garlic and parsley. You can even sprinkle some on top before baking for a cheesy crust.
Gluten-Free Alternatives
If you need gluten-free rolls, use a gluten-free flour mix. Look for one that works for bread. You can find these at most stores. The rest of the recipe stays the same. Just remember to check the ingredients. Some mixes need extra binding agents, like xanthan gum. Follow the package instructions for the best results.
Sweet Garlic Rolls Version
Want to try something sweet? Make sweet garlic rolls! Keep the garlic but add sugar. Use about 3 tablespoons of sugar instead of 2. You can also add a teaspoon of vanilla extract for extra flavor.
For a nice touch, top the rolls with a sweet glaze after baking. Mix powdered sugar with milk and drizzle it on top. This sweet twist will surprise your taste buds!
Storage Info
How to Store Leftover Rolls
To keep your soft garlic bread rolls fresh, store them in an airtight container. This helps keep moisture in and prevents them from getting dry. You can also wrap them in plastic wrap or aluminum foil. If you want to enjoy them later, this is the best method.
Reheating Instructions for Freshness
To reheat your rolls, preheat your oven to 350°F (175°C). Place the rolls on a baking sheet and cover them with foil to keep them soft. Heat for about 10-12 minutes. You can also microwave them for 15-20 seconds. The oven method gives a better texture, while the microwave is faster.
Freezing for Long-Term Storage
If you want to freeze your rolls, let them cool completely first. Wrap each roll in plastic wrap, then place them in a freezer bag. This keeps them from getting freezer burn. They can last up to three months in the freezer. To enjoy, simply thaw them overnight in the fridge and reheat as mentioned.
FAQs
How do you know when the rolls are fully baked?
You can tell the rolls are fully baked by checking their color. They should be golden brown on top. You can also tap the bottom of a roll. If it sounds hollow, it’s ready. The internal temperature should reach about 190°F (88°C). This ensures they are cooked through but still soft.
Can I make the dough ahead of time?
Yes, you can make the dough ahead of time. Prepare the dough and let it rise as usual. After the first rise, you can cover it tightly and chill it in the fridge. This slows down the yeast. When you are ready to bake, take it out and let it warm up. Then shape and let it rise again before baking.
What if my rolls are too dense?
If your rolls are too dense, it may be due to under-kneading. Make sure to knead until smooth and elastic. It could also be that the dough did not rise enough. Make sure to give it enough time to double in size. If you used old yeast, it may not have worked well. Always check the yeast’s freshness before starting.
You learned how to make soft garlic bread rolls from scratch. We covered key ingredients and step-by-step instructions. I shared tips to ensure fluffiness and fun variations to try. You also found storage tips to keep your rolls fresh.
Now you can impress anyone with your baking skills. Baking can be fun, and each step helps you learn. Enjoy making these rolls and share them with your friend