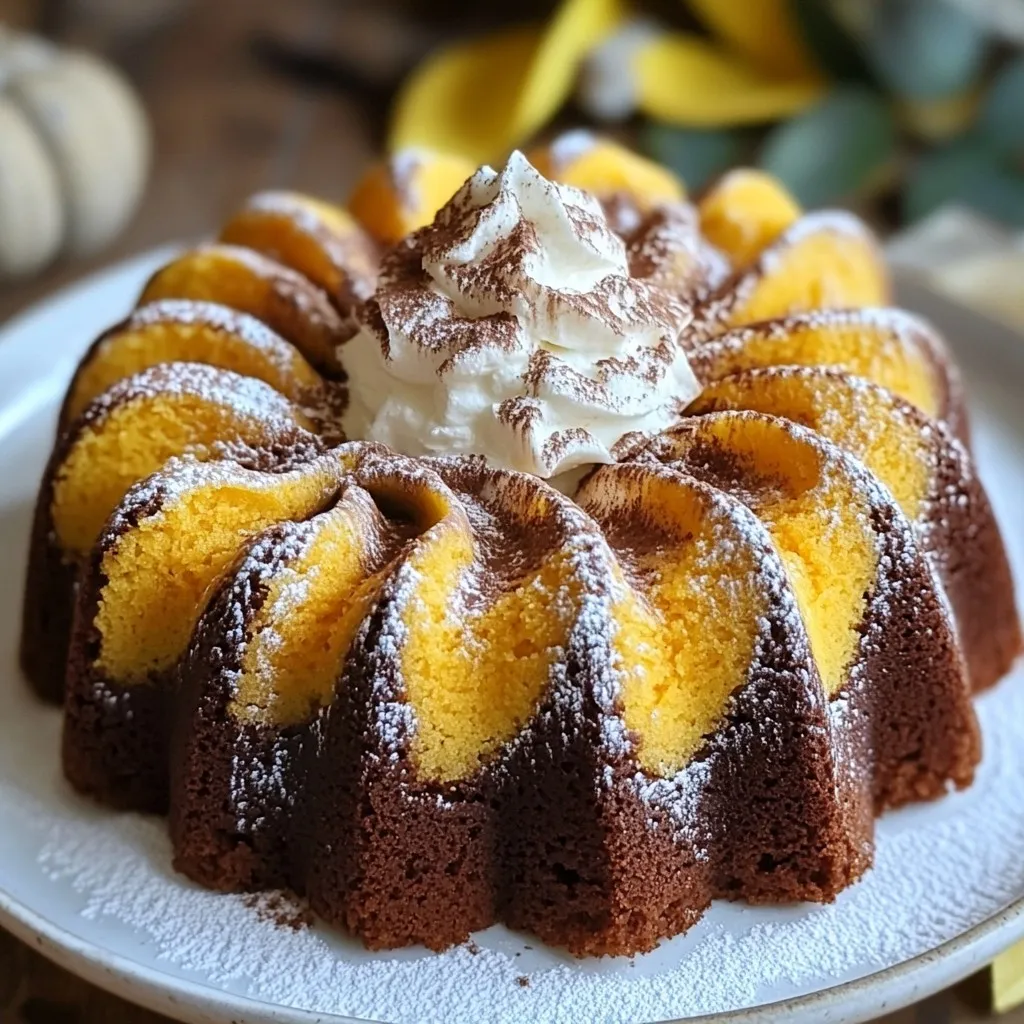
Craving a sweet treat that’s both delicious and vegan? Try my Vegan Pumpkin Marble Cake! This recipe combines warm pumpkin flavors with rich chocolate swirls, creating a perfect dessert for any occasion. Whether you’re a seasoned baker or new to vegan cooking, I’ll guide you through each step. Let’s create a delightful cake that’s sure to impress your friends and family. Ready to dive in?
Why I Love This Recipe
- Delicious Flavor Combination: The rich pumpkin flavor perfectly complements the chocolate, creating a delightful balance that pleases the palate.
- Vegan and Healthy: This cake is made with all plant-based ingredients, making it a healthier dessert option that everyone can enjoy.
- Easy to Make: With simple steps and readily available ingredients, this recipe is perfect for both novice and experienced bakers.
- Beautiful Presentation: The marbled effect not only looks stunning but also makes it a great centerpiece for any gathering.
Ingredients
Complete List of Ingredients
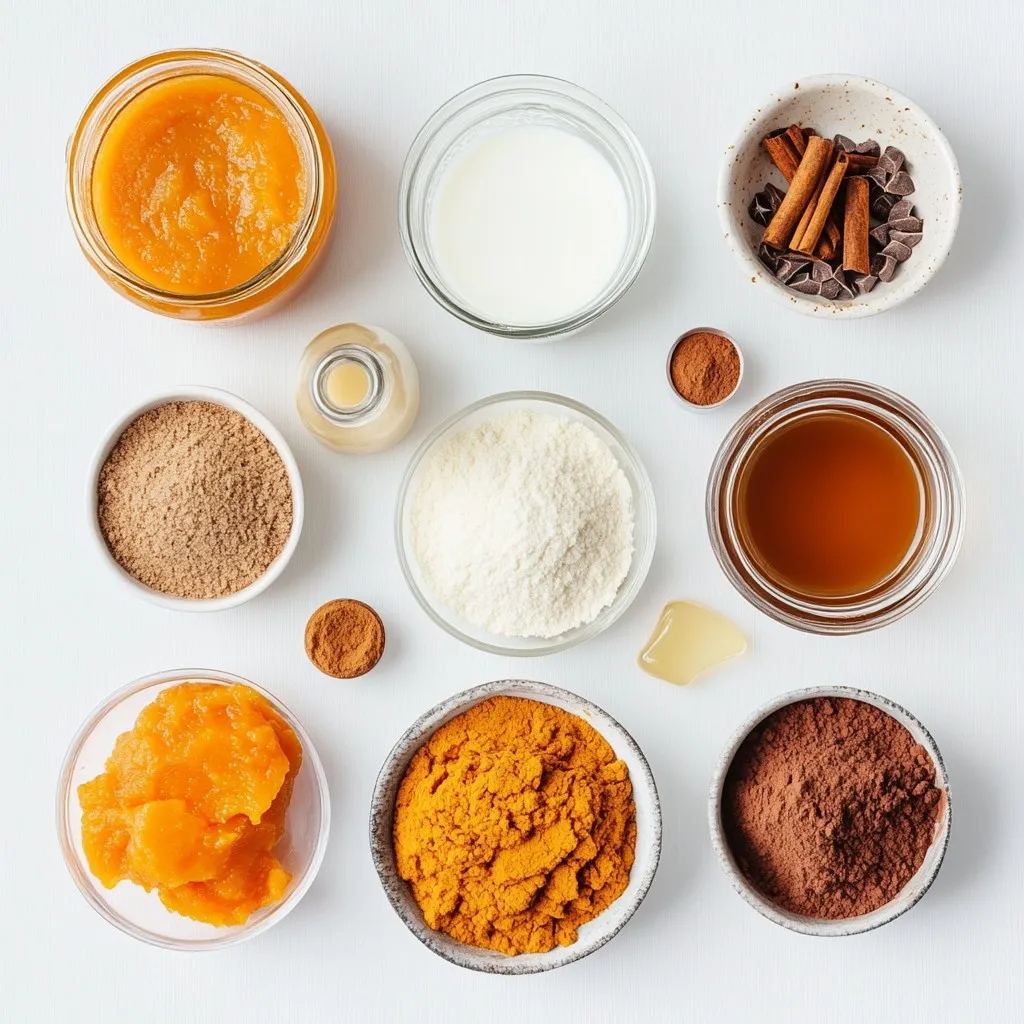
To make this vegan pumpkin marble cake, gather these ingredients:
– 1 cup canned pumpkin puree
– 1 cup almond milk (or any preferred plant-based milk)
– 1/2 cup coconut oil, melted
– 1 cup brown sugar, packed
– 1 teaspoon vanilla extract
– 2 cups all-purpose flour
– 1 teaspoon baking soda
– 1 teaspoon baking powder
– 1/2 teaspoon salt
– 1 teaspoon ground cinnamon
– 1/2 teaspoon ground nutmeg
– 1/4 teaspoon ground ginger
– 1/2 cup unsweetened cocoa powder
– 1 tablespoon maple syrup (for drizzling on top)
Substitutions for Common Ingredients
You can easily swap some ingredients based on what you have:
– Pumpkin puree: Use sweet potato or butternut squash puree for a different taste.
– Almond milk: Any plant-based milk like soy, oat, or coconut milk works well.
– Coconut oil: You can replace it with vegetable oil or melted vegan butter.
– Brown sugar: Use coconut sugar or maple sugar for a unique flavor.
– All-purpose flour: For a gluten-free option, try almond flour or a gluten-free blend.
Tips for Choosing Quality Ingredients
Selecting the right ingredients makes your cake shine:
– Pumpkin puree: Look for 100% pumpkin, not pumpkin pie filling.
– Cocoa powder: Choose unsweetened, high-quality cocoa for rich chocolate flavor.
– Spices: Freshly ground spices give a stronger taste than pre-ground ones.
– Sugar: Use organic sugars if possible, as they are often less processed.
By using these tips, you can ensure your vegan pumpkin marble cake is delicious and delightful!
Step-by-Step Instructions
Preparation Steps for the Cake
First, preheat your oven to 350°F (175°C). Grease a 9×5 inch loaf pan. You can use cooking spray or oil. Alternatively, line the pan with parchment paper for easy removal. Next, gather your ingredients. You need canned pumpkin puree, almond milk, melted coconut oil, brown sugar, and vanilla extract. These will be your wet ingredients.
Detailed Instructions for Mixing and Swirling Batters
In a large bowl, combine the pumpkin puree, almond milk, melted coconut oil, brown sugar, and vanilla extract. Whisk these until they are smooth and well mixed. In another bowl, whisk together the dry ingredients: flour, baking soda, baking powder, salt, cinnamon, nutmeg, and ginger. Mix them until they are evenly combined.
Now, slowly add the dry ingredients to the wet mixture. Fold gently with a spatula or spoon. Do not overmix; it’s okay to have a few lumps. Next, divide the batter into two bowls. In one bowl, stir in cocoa powder to make a chocolate batter. You now have two types of batter: pumpkin and chocolate.
To create the marbled look, spoon dollops of pumpkin and chocolate batter into the prepared loaf pan. Use a knife or skewer to swirl the batters together. Be gentle; you want to see the marbling, not mix them completely. Finally, drizzle maple syrup on top for extra sweetness.
Baking and Cooling Processes
Place your loaf pan in the preheated oven. Bake for 50-60 minutes. To check if it’s done, insert a toothpick in the center. It should come out clean or with a few moist crumbs. Once baked, let the cake cool in the pan for about 10 minutes. Then, carefully move it to a wire rack to cool completely before slicing. Enjoy your beautiful vegan pumpkin marble cake!
Tips & Tricks
How to Achieve Perfect Marble Swirls
To get those perfect marble swirls, you need to layer the batters carefully. Start by spooning a dollop of pumpkin batter into your loaf pan. Then, add a dollop of chocolate batter right next to it. Keep alternating between the two. When the pan is full, take a knife or skewer and gently swirl through the batters. This creates the marbled look. Just be careful not to mix them completely. A little separation makes for a beautiful cake!
Common Mistakes to Avoid
One big mistake is overmixing the batter. This can make your cake dense. Just mix until you see no dry flour. Also, don’t skip the cooling step. Letting the cake cool in the pan for about 10 minutes is key. It helps it set and keeps it from breaking apart. Lastly, make sure to check for doneness with a toothpick. If it comes out clean or with a few crumbs, your cake is ready!
Enhancing Flavor and Texture
To boost flavor, consider adding a pinch of salt to the cocoa powder. This can really enhance the chocolate flavor. You can also add a bit more spice if you love warmth. Try an extra dash of cinnamon or nutmeg. For texture, using room temperature almond milk helps. It creates a smoother batter. Lastly, don’t forget the drizzle of maple syrup on top! It adds a nice shine and sweetness to the cake.
Pro Tips
- Use Fresh Pumpkin: For a more vibrant flavor, consider using fresh pumpkin instead of canned puree. Roast and puree your own pumpkin for the best results.
- Check Your Oven Temperature: Ovens can vary, so it’s a good idea to use an oven thermometer to ensure your cake bakes at the correct temperature for even results.
- Don’t Overmix: Mixing the batter too much can lead to a dense cake. Stir just until the dry ingredients are incorporated to maintain a light texture.
- Experiment with Spices: Feel free to adjust the spices to your liking. Adding a pinch of cloves or allspice can enhance the autumnal flavor profile of this cake.
Variations
Alternative Flavor Add-ins
You can change the flavor of your vegan pumpkin marble cake. Try adding chopped nuts or dried fruit for texture. Walnuts or pecans work well. You can also add different spices. For instance, try allspice or cardamom for extra warmth. If you want a richer taste, mix in some chocolate chips or white chocolate chips. These add-ins can make your cake more unique and fun.
Gluten-Free Option
If you need a gluten-free cake, you can swap the all-purpose flour. Use a gluten-free flour blend instead. Make sure it contains xanthan gum for structure. You can also use almond flour or coconut flour, but note that these may change the cake’s texture. Start with a mix of gluten-free flour and almond flour for the best results. Adjust the liquid if needed since these flours absorb more moisture.
Adjusting Sweetness Levels
You can control how sweet your cake is. If you like a less sweet cake, reduce the brown sugar by 1/4 cup. You can also use maple syrup instead of brown sugar for a more natural sweetness. If you prefer a sweeter cake, add a bit more sugar or use agave syrup. Taste the batter before baking to get it just right. Remember, the sweetness can change slightly after baking, so adjust to your liking.
Storage Info
Best Practices for Storing Cake
Store your vegan pumpkin marble cake well to keep it fresh. Place the cake in an airtight container. You can also wrap it in plastic wrap. Keep it at room temperature for up to three days. If you want to store it longer, put it in the fridge. In the fridge, it can last up to a week. Just remember to let it cool completely before wrapping.
Freezing Instructions
Freezing is a great way to save leftover cake. First, let the cake cool fully. Then, slice it into portions. Wrap each slice in plastic wrap tightly. After that, place the wrapped slices in a freezer-safe bag. Label the bag with the date. You can freeze the cake for up to three months. When ready to enjoy, just thaw a slice in the fridge overnight.
Reheating Tips for Leftovers
To reheat the cake, use the oven for the best results. Preheat your oven to 350°F (175°C). Place the slice on a baking sheet. Cover it loosely with foil to keep it moist. Heat for about 10-15 minutes, or until warm. You can also use a microwave if you prefer. Heat a slice for 15-20 seconds, but check it often. Enjoy your warm slice with a cup of tea!
FAQs
Can I use a different type of milk?
Yes, you can use any plant-based milk. Almond, soy, or oat milk works well. Each milk will bring its own flavor. Almond milk gives a nutty taste, while oat milk adds creaminess. Choose what you enjoy most. Just keep the amount the same as in the recipe.
What can I substitute for coconut oil?
You can replace coconut oil with vegetable oil or melted vegan butter. Both options will keep your cake moist. If you want a lighter flavor, go for vegetable oil. If you prefer more richness, use vegan butter. Just make sure it is melted for a smooth batter.
How long does the cake last?
The cake lasts about 3 to 4 days at room temperature. Keep it in an airtight container. If you want it to last longer, you can freeze it. Wrap slices in plastic wrap. Then place them in a freezer bag. The cake can stay fresh for up to 3 months in the freezer.
We explored the key ingredients needed for a great marble cake and how to choose the best ones. I shared step-by-step instructions to make mixing easy. Tips for perfect swirls and common mistakes to avoid were included. We also discussed variations, storage, and answered common questions.
Marble cake is fun to make and eat. With these tips, you can create tasty treats for everyone to enjoy. Happy bakin